

Pitt Meadows Drywall Repair Services
Cost-Effective Drywall Repair Contractors in Pitt Meadows, British Columbia
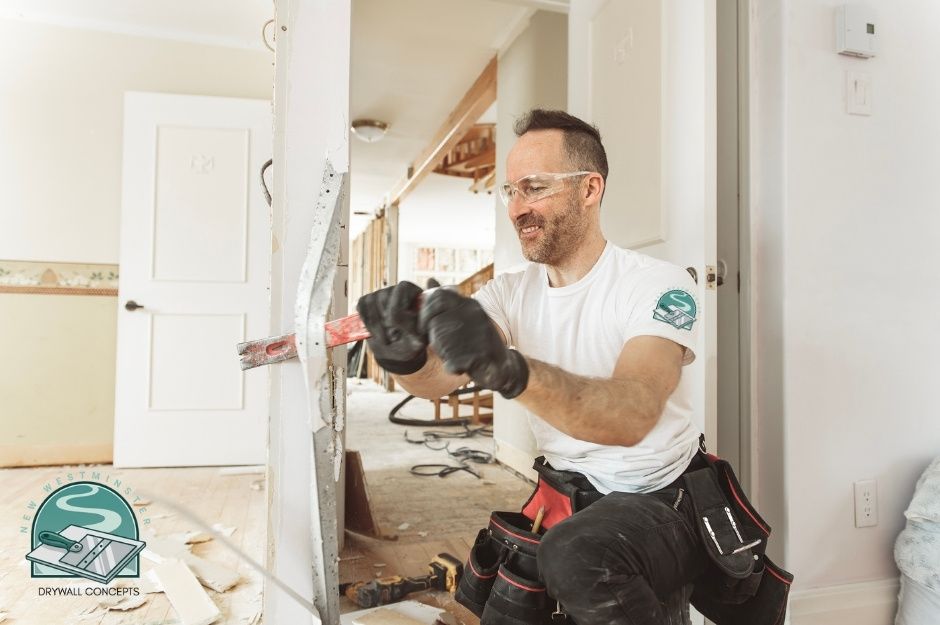
Professional drywall services in Pitt Meadows encompass everything you need to maintain, repair, and enhance your walls and ceilings. Local drywall specialists at New Westminster Drywall Concepts, offer comprehensive solutions including crack repairs, water damage restoration, popcorn ceiling removal, and expert installation for both residential and commercial properties. Serving Pitt Meadows' estimated 19,498 residents across the city's 86.34 square kilometres, these professionals understand the unique challenges of working in Metro Vancouver's agricultural heartland.
When your walls need attention, skilled technicians can handle various issues from patching holes and fixing anchor damage to addressing ceiling cracks and water-damaged sections. These experts bring years of experience in proper taping, mudding, and finishing techniques to ensure seamless repairs that match your existing surfaces. Given that Pitt Meadows experiences an oceanic climate with cool, rainy winters averaging 252.4mm of precipitation in January alone, moisture-related drywall issues are particularly common in local homes.
Your property deserves quality craftsmanship, whether you need soundproofing installation or complete drywall replacement. Pitt Meadows contractors deliver reliable solutions with attention to detail, using professional-grade materials and proven methods to achieve lasting results that protect and beautify your space. With 82% of Pitt Meadows located within the environmentally protected Green Zone, contractors must also be mindful of eco-friendly practices and materials when working in this unique Lower Fraser Valley community.

New Westminster Drywall Concepts (CP)

Comprehensive Drywall Repair Services in Pitt Meadows, BC
Professional drywall contractors in Pitt Meadows provide specialized drywall repair services to restore damaged walls and ceilings to their original condition. Skilled technicians use advanced techniques and premium materials to address common drywall issues. Operating in a city that's been incorporated since 1914, these contractors bring over a century of combined community experience to both heritage homes and modern constructions.
Ceiling Crack Assessment and Repair
Ceiling cracks can stem from structural movement, water damage, or improper installation. A thorough inspection determines the crack's underlying cause and appropriate repair method. In Pitt Meadows, where over 68% of the area lies within a floodplain and is protected by 64 kilometres of dikes, foundation settling and moisture-related ceiling cracks are particularly prevalent concerns for homeowners.
Expert technicians clean the cracked area and remove loose material before applying professional-grade joint compound. Multiple thin layers ensure a seamless finish.
For structural cracks, professionals install reinforcement tape to prevent future splitting. The repair area receives careful sanding and texturing to match surrounding surfaces. Given Pitt Meadows' location at the junction of the Fraser and Pitt Rivers, contractors are especially experienced in addressing cracks caused by the area's unique soil conditions, including the deep peat and bog soil found in the northern sector near Pitt Lake.
Popcorn Ceiling Removal and Surface Smoothing
Professional popcorn ceiling removal starts with testing for asbestos - a crucial safety step for homes built before 1990. Contractors protect your floors and walls with heavy-duty plastic sheeting. This is particularly important in Pitt Meadows' Heritage Preservation Area, where several buildings of significant heritage value, including structures dating back to the community's early agricultural days, may require specialized handling.
The removal process involves carefully spraying the texture with water and scraping it away using specialized tools. Your ceiling receives professional smoothing and repairs to address any imperfections.
The final step includes applying fresh drywall compound and creating a modern, smooth finish that brightens your space.
Replacing Damaged Ceiling Panels
Water-damaged or broken ceiling panels require complete replacement to prevent structural issues. Technicians carefully remove damaged sections without disturbing surrounding drywall. In Pitt Meadows' challenging climate, where annual precipitation reaches 1,649.1mm and winter temperatures can drop to record lows of -19°C, thermal expansion and moisture damage frequently necessitate ceiling panel replacement.
New panels are cut to precise measurements and secured to ceiling joists. Professional-grade materials ensure proper support and longevity.
Skilled finishing work includes tape application, multiple compound layers, and expert texturing to create an invisible transition between old and new sections.
Drywall Hole Patching Solutions
Small holes from anchors or hooks need proper preparation and filling with specialized compounds. Larger holes require drywall patches cut to exact specifications.
Technicians install backing support for medium to large holes to ensure structural integrity. Professional patch blending techniques create seamless repairs.
Your walls receive careful sanding and texture matching to eliminate any trace of damage. Expert color matching ensures patches disappear completely after painting.
Specialized Drywall Repairs: Joint, Anchor, and Water Damage
Professional drywall repair requires specific techniques and tools to address common issues that compromise wall integrity and appearance. Expert solutions can restore damaged areas to their original condition while preventing future problems. Contractors serving the Metro Vancouver Regional District, including Pitt Meadows and neighboring communities like Maple Ridge, Port Coquitlam, and Surrey, must adapt their techniques to the region's unique environmental challenges.
Tape and Joint Repair for Seamless Walls
Joint repairs demand precision to create smooth transitions between drywall panels. Your first step is removing loose or damaged tape and cleaning the joint area thoroughly.
Apply new self-adhesive mesh tape over the joint, ensuring it lies flat against the surface. This provides a strong foundation for the repair.
Layer joint compound in three thin coats, feathering each application wider than the last. Sand between coats with fine-grit sandpaper for optimal smoothness.
Professional-grade joint compound and proper technique eliminate visible seams, creating a flawless wall surface ready for paint or texture.
Repairing Anchor Damage and Small Imperfections
Anchor holes from removed shelving or wall-mounted items need immediate attention to maintain wall integrity. Remove any remaining hardware and loose material around the damaged area.
For small holes, apply spackling compound directly with a putty knife. Larger anchor holes require a drywall patch or backing support for stability.
Common Anchor Repairs:
- Wall anchor holes
- Picture hook damage
- TV mount removal
- Shelf bracket holes
Sand the repaired area flush with surrounding drywall once the compound dries completely.
Water Damage Assessment and Restoration
Water-damaged drywall shows distinct signs: discoloration, swelling, or soft spots. Identify and fix the water source before starting repairs to prevent recurring damage. This is especially critical in Pitt Meadows, where proximity to Pitt Lake (the world's largest freshwater tidal lake), the Fraser River, and multiple sloughs and waterways creates elevated humidity levels and potential flooding risks despite the extensive dike system.
Cut out affected sections beyond visible damage, as water often spreads within the wall cavity. Install new moisture-resistant drywall panels in high-risk areas. Given that 86% of Pitt Meadows lies within the BC Agricultural Land Reserve and much of the area consists of environmentally sensitive wetlands like Pitt-Addington Marsh and Codd Wetland Ecological Conservancy Area, moisture-resistant materials are essential for long-term durability.
Test surrounding areas for moisture content using a moisture meter. Replace any sections showing readings above 12% to prevent mold growth.
Match existing texture patterns carefully when finishing repaired areas. Allow proper drying time between compound applications to ensure lasting results.
Professional Drywall Installation and Soundproofing
Professional drywall installation requires precise techniques and specialized tools to create smooth, sturdy walls. Soundproofing options can significantly reduce noise transmission between rooms when installed correctly. In Pitt Meadows' urban town centre, where most of the community's residents live in close proximity, soundproofing has become increasingly important for maintaining privacy and comfort in both residential and commercial spaces.
Drywall Hanging Process and Best Practices
Start by measuring and marking your wall studs at 16-inch intervals. Cut your drywall sheets to size using a sharp utility knife and T-square for accurate measurements.
Secure the drywall panels to wall studs using appropriate-length screws, spacing them 12 inches apart on the edges and 16 inches in the field.
Essential tools needed:
- Electric screw gun
- Utility knife
- Measuring tape
- Level
- T-square
- Drywall saw
Begin at the ceiling and work your way down, staggering the joints to prevent weak points. Leave a 1/2-inch gap at the floor for expansion. This expansion gap is particularly important in Pitt Meadows due to the area's deep peat and bog soil conditions in certain sectors, which can cause structural settling and movement over time.
Soundproof Drywall Installation Techniques
Use specialized soundproof drywall panels with multiple layers and sound-dampening cores. These panels typically measure 5/8-inch thick and contain gypsum, ceramics, or viscoelastic polymers.
Install resilient channels perpendicular to the studs before hanging the drywall. This creates an air gap that reduces sound transmission.
Apply acoustic sealant around electrical boxes, joints, and where drywall meets the floor or ceiling. Consider double-layer installation with staggered seams for maximum soundproofing.
Fill any gaps with acoustic caulk and use sound-dampening insulation between studs before closing up walls.
Expert Drywall Finishing for a Perfect Surface
Professional drywall finishing transforms raw sheetrock into beautifully smooth, paint-ready surfaces through precise mudding and taping techniques. Skilled finishing work creates seamless walls and ceilings that enhance your home's aesthetic appeal. For Pitt Meadows homeowners, where summer temperatures can reach record highs of 41.4°C (106.5°F), proper finishing techniques that account for thermal expansion are crucial for long-lasting results.
Mudding for Smooth and Even Walls
Drywall mud application requires multiple thin coats to achieve a flawless surface. The first coat fills major gaps and covers fasteners, while subsequent layers gradually build up to create an even finish.
Your walls need proper drying time between coats, typically 24 hours, to prevent cracking and ensure proper adhesion. Professional finishers use specialized tools like broad knives and taping tools to apply compound smoothly. In Pitt Meadows' oceanic climate, where humidity levels can vary significantly between the wet winter months (with December averaging 214.1mm of precipitation) and drier summer periods, contractors must adjust drying times accordingly to ensure optimal results.
Light sanding between coats removes imperfections and creates the ideal surface texture. The final coat extends beyond the seams to blend perfectly with surrounding areas.
Taping for Clean, Durable Seams
Quality paper or mesh tape reinforces drywall joints and prevents future cracking. Your contractor will embed the tape in a base layer of compound, ensuring no air bubbles remain trapped underneath.
Corner beads protect external angles while providing crisp, straight lines. Internal corners receive special attention with careful tape application to prevent separation.
Professional tapers use the correct compound consistency and proper pressure to avoid common issues like tape bubbles or wrinkles.
Preparation for Painting and Final Aesthetics
A thorough final sanding creates the smooth canvas needed for painting. Your contractor will use fine-grit sandpaper and sanding poles to achieve professional results without leaving scratches or tool marks.
Dust removal is critical before painting begins. Clean surfaces allow paint to adhere properly and create an even sheen. This step is particularly important in Pitt Meadows, where the community's agricultural setting and proximity to farmland can introduce additional dust and airborne particles during the finishing process.
Pre-painting inspection checklist:
- Surface smoothness check
- Joint visibility test
- Corner alignment verification
- Proper sanding completion
- Complete dust removal
Whether you're restoring a heritage property in Pitt Meadows' historic downtown area near the old General Store (now the Pitt Meadows Museum) or finishing a new construction project, professional drywall services ensure your walls meet the highest standards of quality and durability in this unique Lower Fraser Valley community that's been home to residents for over 1000 years.
